There will be times at a go where you will start to outgrow the harddisk capacity on your computer, that is where the magic of externally storage devices come in, not only allowing you to expand your storage capacity on your current setup but adds a degree of flexibility by allowing the content to be accessed to any computer it is connected to and not isolated to a single setup. This tutorial aims to teach anybody about assembling a simple affordable, large external storage option using an external hard drive & case.
The drive enclosure, as it is
Drives for consumers generally come in 2 formats, a 2.5″ harddisk which are typically used on laptop computers given it’s smaller size and lower power consumption. The other are desktop equivalent 3.5″ harddisks which are usually more bang for the buck per gigabyte, spots faster seek times and performance (7500 – 15000 rpm to the 2.5″ 5400 rpm speeds), but draws much more power and require a dedicated power supply which are not actually very portable in nature. Both types of drives can come in various types of formats, with the more comment SATA I/II, the older and generally defunct parallel ATA (or PATA IDE drives), to the more performance and server orientated SCSI or SAS (Serial Attached – SCSI) drives. For consumers, PATA or SATA are the more common ones.
I will be using the 3.5″ hard disk in my illustration, but the logic of installing a 2.5″ is very similar otherwise much simpler in nature as well. It’s just open install, plug and close it back on, it’s that simple.
One of the main reasons why I got a 3.5″ external hard drive is the convenience it offers by having the ability to store my all songs, photos & work files on a common drive which I can access from any computer within the house by just plugging it in. This means I can not only able to work & access my files anywhere, but packed in are my tunes to work/keep me entertained while I am at it. Furthermore, with the ablity for PCs to boot off external storage devices, you can literally also carry your workspace with you by including your OS in the drive as well (but do not expect any breakneck speeds unless you have a fast port connection like e-SATA). This all beats having all your files stored only one one drive in one computer, seriously limiting your working capabilities.
Moreover its also a cost effective way to transport large files compared to purchasing expensive flash or micro-drives in comparative gigabyte capacity, not to mention cheaper than the slightly steeper priced but more handy 2.5″ hard drive option. Whats more? the 3.5″ hard drive is a universal format, which means you can use any old 3.5″ IDE hard disk from any IDE interfaced computer of any capacity to work with this (or most enclosures). Furthermore, it also a great way to share files with you family, friends or neighbors alike by just plugging this hot plug & play device to their computers via USB 2.0, let be SATA II hot ports.
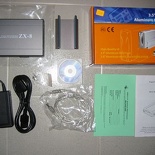
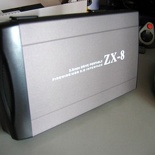
The drive enclosure I’ve got here is a Micro-G ZX-8 model MS-35U2 external 3.5″ aluminum enclosure with a built-in fan priced at around $90SGD. Included in the package (Fig 1.0) is the main enclosure unit on the upper left followed by its stand on the right, box then from bottom left to right, the power adapter, standard computer power cable, pack of securing screws, driver mini CD-rom (which I won’t be needing) for non plug & play OS, USB 2.0 cable, warranty & manual. From what I’ve seen most manufacturer don’t include fans in their enclosures- a mistake for most if you are taking about up-time & stability issues due to excessive heat build-up in the case. Instead some manufactures have in place, USB hubs, 7-1 card readers which I don’t see as important as included hard drive cooling, so if you are intending to get an enclosure, at least get one with a fan. Now lets see what this baby have to offer:
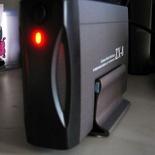
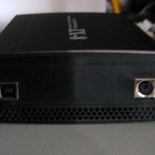
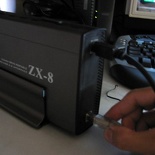
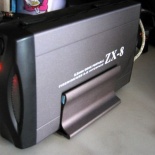
The face of the drive is as shown in Fig 2.0 the button on the left is the power button to its right is the drive activity LED, the grey grille like things on the top & bottom are air vents to allow air circulation by the internal fan. At the rear (Fig 2.1) the power plug is located on the right while the USB port is on the left. Compared to the 2.5″ hard drives found in laptops, 3.5″ hard disks require power from an adapter (unlike the latter which draws power straight from the USB port). Its due to is comparatively higher power drain due to its offered higher capacities, higher data seek & revolutions (7200rpm to 5400rpm), therefore lacking the full ease of portability & the need of a power adapter to work.
Assembly process
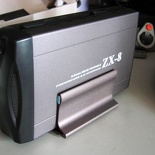
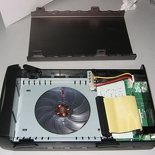
The drive is made out of aluminum with a plastic face & can be placed flat on its side, or placed as a tower with the full aluminum provided stand. As said, assembling one can actually be quite easy, everything you need is usually included in the box, what you need is just a harddrive for it to house. Its almost similar to that of plugging in you standard IDE harddrive into your motherboard with the ribbon cable. Upon opening the enclosure you can already identify “where goes where” if you’ve assembled PCs before.
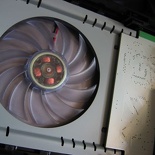
Over here you can see a close up of the internal fan with transparent motor housing. Theres sufficient space for airflow with the given slots of the base where the harddisk is supposed to sit (Fig 4.1). There is also sufficient headroom for the drive when the enclosure is close so as not to cover or obstruct the “breathing hole” found in almost all hard drives.
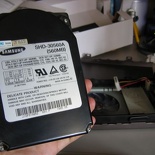
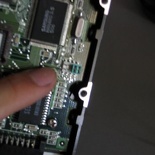
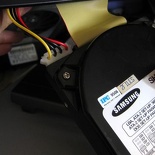
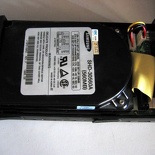
Here I have an old Samsung harddrive which I would be using for this tutorial. Before installing the drive, ensure that the drive has its jumpers set to “master mode”, all PATA harddrive enclosures will only work in MASTER and not SLAVE. Consult the jumper arrangements which are usually printed or crafted onto the drive itself. If you have a SATA drive (those with a small clip on ribbon cable, usually in red), you can completely ignore this part competely and just plug in the data cable straight away.
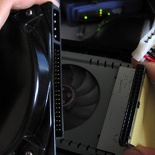
Thereafter, plug the ribbon cable into the drive’s IDE port, followed by the 12v power cable. There are only 2 cables needed for a drive to work, le tbe for both PATA and SATA drives. Remember, both the ribbon & power cables can go only one way so it wouldn’t be much of a problem unless your IDE cable on your drive do not have a “right side up” notch. Thereafter look at the the edge of the cable for a small arrow, that denotes the “first pin”, align it to the harddisk’s first pin (the harddrive’s first pin schematics are printed on the drive itself, otherwise its usually on the right most pin if you hold the back of the harddrive facing towards you).
That is all the trouble for PATA drives, SATA cable connectors are mostly foolproof and can only go in one direction, which are more common used now.
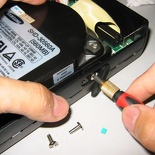
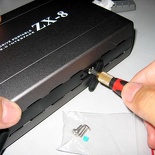
With that done tuck the cabled neatly into the provided space & secure the drive using the provided screws, make sure no cables are blocking the fans or vents so as not to disrupt airflow and affect cooling- these drives can run very hot after a few hours.
Powering on and detecting
Put on & secure the cover. Plug-it-in, the power & USB cable that is & turn it on. If your drive is a notebook 2.5″ one, simply just plug in your USB cable and your drive is able to run off the USB port power itself. For notebook hard disks manufacturers usually include a second USB connector for additional power or when you drive won’t turn on, usually you won’t need this unless your USB power is un-powered, that is where you plug in this secondary USB port into a powered one to run the drive, only when sufficient voltage is satisfied, then the enclosure will power on the drive.
3.5″ enclosures on the other hand will require a separate power brick to feed power, usually running off the wall mains.
Detection & use
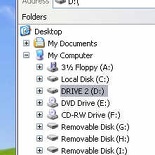
Once plugged in and powered on, windows should detect your hard disk by it’s brand or device name (as a prompt on the task bar) as a USB mass storage device & automatically install the needed drivers & register it like DRIVE 2 or the next available drive letter as shown, depending on what you name you 2nd hard disk.
You usually won’t have a need for drivers at all, unless if you are running an old OS or plug & play is not available (OS before WinXP, Vista or Mac OS X), install the drivers included in your package. That is, provided that you’ve already formatted your disk. However, if you are using a brand new, un-formatted drive (though almost all manufacturers sell their hard disk’s formatted) windows will prompt you to format the drive, otherwise you can always run fdisk at command prompt of by just simply booting into the dos environment to do it.
The limit of the this enclosure’s capacity of course depends completely on the hard drive you provide, usually the enclosure is just a basic circuit to link the drive integrated electronics to interface with USB then to your system, so technically there is no restriction to the hard disk capacity an enclosure can take. Though using a higher rated drives may result in cooling, vibration or noise issues in the long run which might shorten the life span of the drive itself.
Little about file formats
If you are using Windows XP or Vista, format your drive in the NTFS format, not FAT. This format is native to windows on the windows NT format unless you are using a old low capacity harddisk with 20GB of storage space or less (like me), formatting in FAT32 may be a good option & it allows a performance increase, at the expense of functionality, security, reliability & performance NTFS offers.
Do note that NTFS is a proprietary format for windows, so if you intend to access your files on Mac OS or Linux out of the box, FAT32 is a good choice. This applies too if you wish to multi-boot Operation systems or :install back dated operating systems such as Win9x, or Win2000. For hard drives or partitions with 2GB of storage space or less (which I will recommend mostly for thumb drives as well), the lower FAT format is recommended. Once done formatting, wollia! your external drive is ready for data loading!

