- Planning and structure (Concept & frame building)
- Medium (Clay) application, setting & surface detailing
- Painting & finishing
Now I will cover the main star of the show- the clay medium, it’s application as well as detailing the clay as it sets.
Choice of clay
I choose white clay for this tutorial as it allows to be molded with moisture. It’s simple in nature- just add moisture. So even if it dries up, I can simply just spot apply water to get cracks or do patch up work. Though white clay is more messier and not as superior for detailing as sculpey clay, it’s softer, easier to work with and a good economical option for beginners as well. Whats more you do not need to bake it at the end to preserve it’s shape.
Applying clay
Now we we begin the rather messy but interesting clay application process. White clay straight from the pack is usually slightly damped for storage purposes. Break away multiple small handfuls of 2cm cubes and soak in water for at least 5mins before applying. This will ensure that the clay will still remain soft for the sculpting and detailing stage.
By varying soaking time you get different variants of clay, here are some general tips and usage:
- Surface moistened clay – Shape-able and adheres external clay, but still retains a degree of rigidity, best used for support wire frame stage
- Uniformly soaked clay – Extremely mold-able and shape-able, used for applying onto base clay surface for craving and detailing.
- Super watery clay are best for crack/gap filling & for patchwork
Smaller lumps of clay softens faster than bigger ones, so its generally up to your personal discretion to determine the soaking time. This varies depending on you general ambient humidity too. You usually have about 5 hours before the clay needs to be moistened for reshaping again.
Application stages
The first blob of clay application is just a matter of getting the clay to adhere onto the frame and form a basic silhouette. Wrap the frame with surface moistened clay and keep adding bulk to fill the hollows, squeezing out air bubbles if they are trapped between clay blobs. Also, this is the part when your skeleton needs the most support during the bulking process, as its taking load for the first time. If any part were to bend or break under the weight of the clay, add reinforcement if needed at this stage.
Fattening up
The second application stage (also known as the fattening stage) requires the layering of uniformly soaked clay onto the previously applied base surface. This clay is generally softer, thus not only allowing you to stick on external pieces and accessories, but also allows you to shift the clay bulk around, patch and scrape in minor preliminary details.
Do apply clay sparingly, patching up slightly more clay than required during this stage as firstly, you do not need to add more clay later which can produce patching lines, (its always easier to remove excess clay when sculpting details). And secondly, to compensate clay shrinkage (not evasive, but by a significantly small amount) upon drying.
Making detailed parts, like the hands
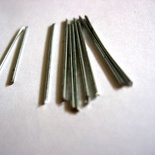
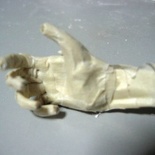
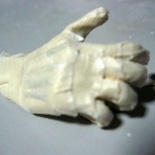
For most figures, requiring digits, feet or props, this is the technique I devised to create completely light yet highly posable and adjustable digit parts. For hands, first off, using the thinner 1mm diameter wire, snip them into 5 similar lengths per hand. You can make reference to the full hand length of your figure as shown below, this will make the digits of a single hand including the thumb.
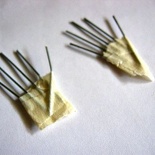
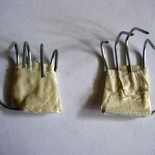
Once in place, wrap up 4 digits in masking tape, creating a palm like surface. Tape the 5th digit at an offset angle from the other four on the inner palm surface, creating the thumb. Do exactly the same for the other hand, only that the thumb position is mirrored horizontally in position. Masking tape is an excellent medium in holding parts together, they are moisture resistant after application, can be painted to mask it’s appearance and can form part of the internal bonded structure as illustrated in my examples for the figure’s skeleton and hands.
With that in place, now you can see now that you can bend each digit independently. This is particularly useful for shaping the hand into a pose or to weld an object in hand. When satisfied, wrap the fingers with more thinly stripped masking tape. Keep applying until the desired thickness for the fingers.
Though its relatively easier to wrap the straight wire fingers with masking tape before bending to shape, it is generally advisable to do the recommended opposite. Why? The masking tape will hold and retain the current bent shape – wrapping, then bending may cause the digits to bend back to the initial state, furthermore, it’s worst when using thinner, flexible wire. Also, bending the digits with masking tape on will crumple and break the uniformity of the fingers, but you can always just tear the excess away with some re-layering work.
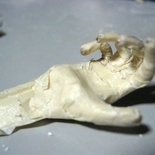
You can add additional details and texture to the hands like the connective ligaments, tendons and knuckles at the back of the hand by sticking in short wire lengths, covered by few layers of masking tape to produce the realistic anatomical look. You can pad and fill the fleshy palm area with compacted tissue paper, to save on masking tape.
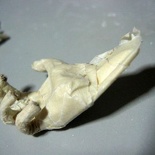
Lastly, to create the meshing point of the hands to the arms, make a rigid cylinder out of masking tape and secure it to the end of the hand so it sticks out like in the picture above.
Assembling the pieces
Its a good habit to create external pieces with some sort of an anchor in mind which you can conveniently attach to your main clap figure when done. This will apply to general pieces added to the main clay body as well.
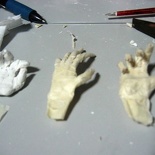
In this case for the hands, I mentioned creating an attachment cylinder made out of masking tape. Placing the the hands at it’s intended site, apply uniformly soaked clay surrounding the end of the hand piece itself, patching it up so that it merges seamlessly with the arm.
Carving in the details
Here is my favorite part where your keen eye for detail comes in. Use scraper to give your figure it’s basic anatomical figure, carving in to define it’s body structure & shape. Have some excess watery clay at hand for repair and patch up work if needed.
A modeling knife/mini screwdriver is useful for intricate depressions and markings, also to create wrinkles and tears on the ripped jeans, fur fluffs on the legs and back. Also, for figure sculpting, its good to know some basic figure anatomy such as how muscles are defined, the state of contracted/relaxed muscles and the general flow of veins on the arms. You can do some research on figure anatomy on the internet or your local library if may. It helps in both 2D figure drawing as well as 3D sculpting.
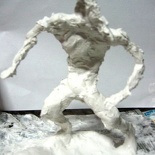
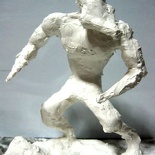
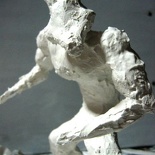
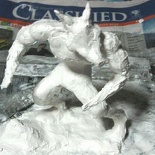
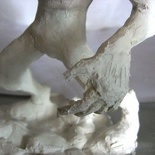
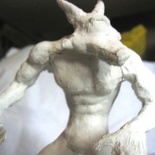
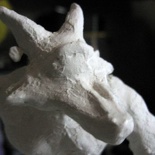
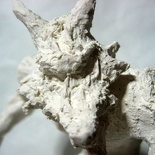
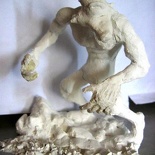
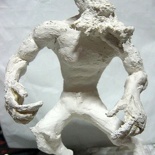
Other notable details are the tongue and front fangs, made using 1mm thin wire pre-wrapped in clay and inserted in the mouth itself, before patching up with some excess clay. Below left, you can see the sculpture after the top most layer of clay had been applied, the next picture shows some of the detailed carved in it after the clay has been partially set and can be shaped.
The foundation base
A good sculpture will require a good flat base to stand on. For the base, rather than getting a simple lacquered wooden base and call it a day, I decided to go for a rocky terrain site also made of clay, thus the need to create tiny rocks and the occasional boulder to litter the whole base piece. Using a modeling knife, add details like scratches, depressions and cracks to the rocks, thus achieving a very worn, weathered and rugged environment.
When the craving and detailing process is complete, leave the sculpture for about a day overnight for the clay to completely dry and settle.
The model now looks almost finished, in its own mean glory, not it’s the matter of adding in the colours. When dry, now you are ready to begin the painting process.
- Planning and structure (Concept & frame building)
- Medium (Clay) application, setting & surface detailing
- Painting & finishing

