27 C
Singapore
Thursday, May 1, 2025
Home Blog Page 169

Short week ahead

0

wee ho hay! its time of the umm year? again where I just can’t stop bitchin’ bout holidays ahead. Yup you got that right its gonna be a short week ahead of me with work days monday, tueday & wednesday. Thursday & friday aren’t exactly free days but stay out days, as I have a wits leader course to attend during this period at toa toyoh HDB hub, working office hours in civilian. Then after that would be one ONE WEEK block leave. Though ain’t much of an “off or so” but its one week which I can spend on the world around me & not coped up in camp. *Yea!*

Furthermore next week would be (comparatively) quite a relaxing week operation flashpoint week where we spend all our time whole day in front of computers training using the SAF modification of the codemaster’s game.

And so what else did I do today? Sent an email to dell enquiring about the price & availability of the dell axim x50v, I estimate it going for about $800SGD considering its recent launch on the US site, going for $499USD. Furthermore one thing I like bout buying from dell are their ridiculously good rebates you get when you order online. For example is an offer on a current brand new dell Axim X30 624Mhz going for $628SGD after a $100 rebate. Would look forward to that on my x50v!

Specs of the x50v:

  • 624 MHz Intel Xscale PXA270 processor
  • 128 MB Flash ROM and 64 MB SDRAM memory with XMB
  • Intel 2700G multimedia accelerator with 16 MB video RAM (Supports openGL games)
  • Integrated 802.11b Wi-Fi & Bluetooth
  • 16-bit VGA 640×480 res TFT LCD touch screen
  • SDIO & Compact flash Type II slots

HP was boosting about the ATI video chip performance when they ran quake II on their hx4700 in an expo. Lets see what they have to say when Dell ran quake III on theirs!

Ok gotta book into camp early now, as I am the DI. See ya on wed night! 😉

First drive out

2

Its sunday morning! family day & what better than driving my family out for the morning. With my dad as my “navigator” (well I am sitting on his usual throne!) mum & sis as passengers behind. Fetched my sis for her tution class in good old jurong west & went to visit my grannys at nearby clementi thereafter. Did my first parking there. Went back to jurong & did my second vertical parking for the day where dad had a lunch snack, brought some fruits where mum went to a hardware store to get some items changed & got some yongtauhoo for lunch.

The highlight was mainly my driving what I can say is.. not bad, especially my parking- all straight & centered on the lot. Luckily for me its a rather clear morning & the carparks are relatively empty, so I more or less had all the time I had. Stalled once at a filter near JJC on my virgin drive to my first destination. I recovered immediately & didn’t caused any inconvience to anybody though, just makes me wonder bout owning an auto car. During lunchtime dad highlighted on my driving tendency for high speed turning, not to mention wide turning, otherwise I am fine & needed more experience on the road. I shoulda work on that! Finally got the hang of the car’s clutch biting point & braking level “effectiveness” by the second journey.

The main thrill was hitting 90km/h on the highway, considering I’ve never went up to the 5th gear before in bukit batok. With the exception of a gear shift stick which don’t really stand vertical when centered/neutral (why I didn’t notice that before!), unlike the new VTI honda civics I’ve used in the driving school. I was all used to my dad’s car by the time. The trip ended with me (guess I am fast becoming everyone’s driver now) driving everybody back home around noon. 😉

With that done, spent some time at home helping my sis with some scoring hints & tips on her “O”level prac exams on tomorrow. Namely on strategies & precaution points she can add into her report for bonues, the rest is up to her. Wish her all the best for the exam tomorrow.

Me having second thoughts of installing kazaa on my fresh comp, it slowed down my first. No wonder, check out this read.

Oh yea before I forget too, new artwork, “bullettime” up on the art gallery.

New handheld Dell Axim x50v

1

Dell had released their new series of Axims, the x50 range. I ‘ve always been looking for a good vga PDA, with the $1199 hp ipaq hx4700 currently in mind, but with the similarly loaded $800 Axim x50v I think its reconsidering time…

Some reviews I dug on the net regarding the x50v:

Spotting an Intel 2700G multimedia accelerator with 16mb dedicated video memory, hey its even better than the hp in terms of multimedia performance. What the dell lacks is a touchpad & larger battery the hp has. All in hand, the Dell is smaller, lighter though spotting a screen of the similar vga res.

Completed frozen throne

2

Well, guess this is not the very of latest news. But hey I finally managed to complete Warcraft III Frozen Throne today, well after (counts fingers) 7 months or so. Guess my time in the army really takes away lots of your gaming time at home. Now lemme see, now I have C&C generals zero hour, Commanche 4, IGI 2, No one lives forever, Diablo II LOD, NFS Underground, WWIII Black Gold, Submarine Titans, JP op genesis left to complete. 😯

Gmail

4

Got an invitation for a gmail account. With 1GB of storage space, how can I resist? haha.

The week ended quite ok with me as DI on the last day (fri) started the week with a much needed slow start with wos duty, allowing me to recover from my fever last sunday. I’ve got an ATTB status for 3 days till wednesday which I never used and I was more or less choinging out for the platoon’s armour phase “revisited” throughout the week. Stopped my dosage of fever & flu med by thrus & finished the antibiotics by today. Feelin’ much better now.

& so, the Armour phase ended this week with prac for the usual prep for ops, casualty evac, vc’s vp, sandtablin’, camo, bridge & mine clearing. With me as the new OVM OIC, guess the new implemented way of doing things now is very much more fast, accountable & efficient than what the previous OVM IC, Michael did. It involves the whole vehicle section at work & co-op into accounting all stores with a storelist (printed for both the vehicle commands & drivers) at the end of training. A new idea & something which raised eyebrows & commendation recieved generally from PC as well. Well… what he didn’t know is me behind the idea, thats nothing much for fame though..I was just doing my job! Sadly, the troopers have to end the week booking out late at 9pm with angcheck recovering some skeletons in their closet during area inspection, very much burnt eddy up. oh well…

My wits idea for an E-armskote had been positively accepted by DY ATC, & he eagerly wants a prototype out. The idea is very much implementing a cookhouse like digital card scanner where the soldier’s 11Bs are scanned, followed by their rifle’s barcode, engraved on the weapon itself. Then the machine will automatically compile the soldier’s name, rank NRIC with the weapon, type, butt & serial no from its archive, together with the time & date drawn out. This allows fast drawing & sending of large number of weapons at a go without compromising security. Moreover records of arms movement for the day can be stored digital of printed to be filed as a hard copy. A novel idea? mmm the problem now is how to come out with the program for it.

Looking forward, it would be an interesting weekend. Furthermore my photocard driving license was mailed in yesterday too.. heh heh…

Tutorial: Drawing and computer coloured art – Part I line art and planning

0
Tutorial: Drawing and computer coloured art

I enjoy sketching and drawing as a form of expression, not to mention a way to relax as well. It’s a hobby I enjoy doing since I was a kid and never stopped since. This tutorial will cover some of the basic techniques I use in creating various hand-drawn artworks you see around the site.

Article table of contents

Line art and planning your piece
Digital colouring with Photoshop

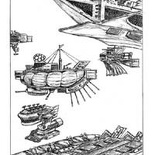
For this tutorial, I am using the art pieces “castles in the sky” a detailed black and white line art piece and “werewarrior”, a computer coloured piece as part of the illustration. in this tutorial.

Getting your arty inspiration
Generally, each artist has their own style & way of assembling a drawing. I usually draw from mind visualization, like using thoughts or snippets objects I’ve seen from a trip, pictures, etc.. & compiling them to form a picture. Such thoughts would usually “flash back” in my thoughts or sleep as drawing ideas. If its neat, I would draw it. Personally, I believe in retaining originality in my pieces & don’t like drawing with any help or from any immediate visual references.

Also I don’t recommend tracing over reference material since you will not learn anything by doing this. Though quick & effective, tracing is just a mechanical act of simply following lines. However on a lighter side, this is not applicable if you are drawing straight from an object (or scenery). Moreover using photographs as a visual guide will overtime, allow you to learn how figure, anatomy or mechanical art works, allowing you to get better with each practice piece.

Art for thought
What you draw usually comes from an inspirtation, having said that it will have a reason to exist and should not be forced or you will end up with something you will not appreciate. Don’t draw for the stake of drawing. Frankly speaking, such desires to draw with a meaning & objective comes naturally, so only pick up that pen if the feeling is there or your art will tend to suffer.

Tools of trade
I usually use Staedtler mars lumograph type 100 art pencils mostly for large scale shading. Otherwise I would be always using mechanical pencils (0.5mm pilot leads) for drawing, shading and fine adjustments.

For longer lasting art pieces, the outlines & shadings are outlined with a fineliner black pen, this is done too if the art piece is to be painted in colour with paint or scanned as lineart into the computer to be photoshopped. Use soft plastic erasers, preferably those Pentel pracer stick erasers for fine erasing & reaching those “hard to erase corners”.

The art piece
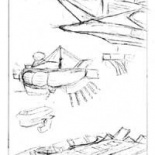
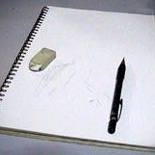
Given the first line of supplies in starting pieces, next get started with the idea in mind, then choose a media, size of your choice, landscape/portrait to portray your thought. In this case, I chose a potrait scene with medieval floater ships in the air. Get that idea fixed in mind. Next, do a rough light skeletal sketch (like the one above), getting in place the location of your items or figures. From there, add the necessary objects (e.g ships, masts, guns, etc… for humanoid figures draw the head, torso & limbs as rough circles otherwise). Arrange the objects as you want them to be. For figure drawing, put arms, legs in a desired pose or action & make any changes lightly over the rough sketch if needed. From here, decide on the light and dark spots of the picture and shade using a pencil to achieve the desired shadows and erase white accordingly to create reflections spots or shine.

Lining
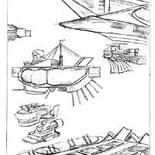
After achieving a desired sketch, its time to get the picture out of the bunch of liny mess you’ve made. Using more force on the pencil, do a darker outline of the rough work, highlighting the final positions of the piece. Detail the shading, reflections and shadows and erase away the lighter, obsolete construction lines thereafter.


The basic draft lines

Darkening outlines

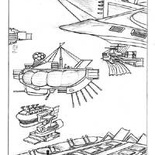
Adding more details

Detailing
Next comes my most favorite part- detailing. To your own perferences, add the desired details to go with your piece, like windows, battle marks, dents, nuts, bolts and weathering. Be sure to clean up the image by erasing any stray construction lines or pencil smudges in the background thereafter or they will turn up as “noise” upon scanning into the computer. When all done up, do a final dark outline, shading & touch ups before achieving the final outlook.

General inventory
For a new hobby, it’s good to have the logistics to keep it going, other than struggling it always just because you do have have the proper material to draw on when the need arises. Thus it’s good to invest in some some simple art material, like a sketchbook for example.

Most of my drawings are first drawn into a sketchbook or otherwise lose pieces of attached A4 paper before sending it to be scanned on the computer. Black and white drawings are scanned at about 300 – 400 dpi, cropped to exact dimension and saved.

For planned colour pieces, black and white versions are first drawn, usually with more distinct outlines then scanned into the computer to be coloured on Photoshop. Having a sketchbook organizes your work, not to mention allowing you to draw almost anywhere, by just tagging the sketchbook and pen whenever you go.

Article table of contents

Line art and planning your piece
Digital colouring with Photoshop

DIY your own home theater personal computer – Installing drives and booting up

0
Tutorial - Build your own DIY home theater personal computer
Article table of contents

Installing CD media drives and harddrive

Whether you intend to use your HTPC as a universal player for DVD or Blue-ray movies, you can always purchase a Blu-ray writer or combo drive for use in the PC as an alternative to a dedicated Blu-ray player. Alternatively, you might want to invest in a large internal harddisk with a capacity of at least 1TB which you can use to store and playback movies or record shows off the TV as well.

Fig 13.0
Fig 13.1

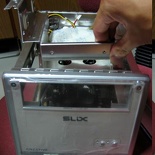
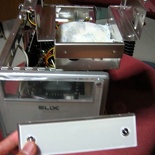
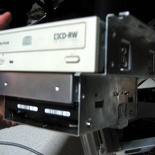
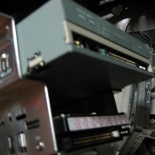
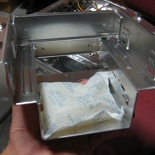
Now onto one of the simpler steps of the tutorial, installing the drives & stuffs. The drive cage is where all the system’s internal & external media drives are secured to (Fig13.0). A small case such as the SliX do not have the luxury of multi-bay slots for multiple harddisks or drives, spotting only a 5.25″ and 3.5″ bay respectively. After unscrewing the locking screws, gently pry out the 5.25″ drive panel where your CD-ROM would be located as shown above (Fig 13.1).

Fig 14.0
Fig 14.1

Using the provided screws, secure the required drive(s) onto the cage/holder (Fig 14.0). For this example, I have an Iomega 40x12x40 Combo drive & a 80GB IBM Deskstar harddrive (HD) to install. Since this is an IDE drive, be sure to set the jumpers for the respective drives so as not to have any config conflicts later on POST.

These days motherboards still spot IDE P-ATA-100/133connectors, so you are still in luck if you wish to connect that old CD-drive or harddisk. This SiS motherboard have two IDE ports, therefore I can choose either to connect both devices together using one IDE port (HD as primary master, CD-ROM as primary slave) or the 2 IDE port option (HD as primary master, CD-ROM as secondary master) using 2 IDE cables. Either way require the harddrive to be set at “master” jumper setting but the CD-ROM at “slave” for the 1st option & “master” for the 2nd. With that, lower the cage into the casing & secure it in place.

If you are using SATA drives, simply just connect the SATA cable onto the back of the hard disk and into any of the SATA connectors on the motherboard followed by the molex power plug, the same is for the DVD-drive as well. Each device will have 2 cables running from it- a data and power cable from your PSU.

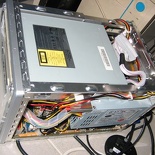
Drives installed
Fig 15.0

Wire management, closing & booting up

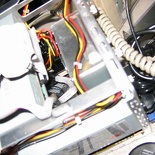
Since we are on the install of the internal components, cabling is inevitable and there comes the problem of messy cabling. Due to the small size of the casing wire management is essential. Excess IDE or SATA cables should be placed in a way no obstructing the ventilation fans. Therefore as far as possible make use of the parallel rails (Fig 15.0) at the side of the casing to act as a runner for power & IDE cables.

Though this is not much of an issue for the thinner SATA cables, for PATA IDE cables, if necessary purchase thin/tied IDE cables instead of the wide ribbon one. Alternatively you can also coil up thick ribbon cables. The general rule is: keep the wires on the outer sides of the interior & leave the central interior as open as possible.

Operating system

Once done, close the other cover, plug in the necessary components & peripheral & booth up, Upon a successful post, go ahead to create format partitions using fdisk or so & install the system’s OS thereafter. These days installation of operating systems are very easy and straightforward, so I won’t be touching much on that. Just follow the basic steps: boot from CD/DVD, format your harddisk, install the OS and configure.

For choices of operating systems, I will recommend Windows for a media PC OS, as it’s the most feature packed out of the box. The details come into what variant of the OS you wish to get- without a doubt, the media PC editions will suit just fine. For Windows XP, we have the Media Center Edition, for windows Vista, I will recommend Home Premium to Ultimate as they have media PC functions built right into the OS.

Additional HTPC software

Of course, another comparative edge a HTPC has is the difference of software it has under the boot, which give it it’s unique functionality, here are some recommended software you can use for your HTPC.

Video and Audio Codecs

A HTPC is of course built to play media and what is more frustrating of not able to play any desired file type you want? With mpg, avi files (including their sub encoding formats such a DivX and Xvid) to quicktime and realmedia, that is alot of players to deal with! A solution is to install an all-in-one codec pack, which allows you to play all types of video or audio files on a single player, say windows media player. There are many different types of codec packs around the internet which you can search for, a few I can recommend will be K-lite and fddshow.

Necessary Home Theater PC accessories

Now with your basic box in place, it’s time to furnish your new addition to the living room with distinguishing features and gadgets which makes it a distinct home theater device. Recapping, the basic need will definitely be a way to put audio and visual to your existing Hi-fi setup. So the following are more or less basic necessities.

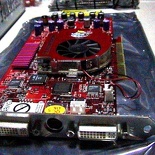
Video card with TV out capability
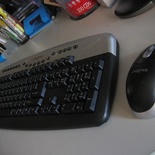
Wireless keyboard & mouse
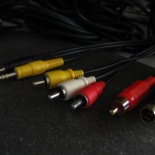
Appropriate video & sound cables

Converting an existing old PC

There is not always a requirement to always build a HTPC from scratch, you can always convert an existing old PC into one, all it takes are these few distinguish features in a nutshell, with the main points to note:

First off, the video card, unless you are using a LCD TV which accepts VGA port output. Consider getting a graphics card which allows you to out put signals to a TV or even better a projector if permits.

Dunk your old keyboard and mouse, upgrade your input with wireless devices- You can complement your system with with a wireless desktop provides freedom of controlling the computer from a distance & not tied down by wires at the same time, providing easy stowage, like under a coffee table of something. It is possible to remote control your computer with a commander.

Furthermore, you can consider connecting audio to your TV, or you can always have an additional audio speaker setup. Otherwise if you have an existing home theater surround speaker set up, make use of you soundcard’s full potential by plugging the output to a home theater amplifier & experiencing DVDs or surround gaming from your soundcard. All these video & audio cables can be easily obtained locally from your friendly electronic or DIY stores

Having said that, generally for the ability for a HTPC to function effectively, you will need the following items:

  • Ability to output to TV screens
  • Able to output sound to your Hi-fi or amplifier
  • Able to universally play any type of video or audio file
  • Able to record/play time shift video (DVR)
  • Able to quickly access media files without clutter
  • Serve as a music repository which you can access to play
  • Able to be remote controlled from your couch

Of course other nice to have features can be networking your PC so you can stream or play your music or videos anywhere in your home.

One of the magical features of a HTPC is it’s modularity which makes it some what future-proof. Need to play Blu-ray movies? upgrade your DVD drive to a Blu-ray player. Need FM radio on your PC. Install an analog/digital tuner with FM/AM radio then, the options are endless and the best thing is that you do not need to do a costly overhaul of your system every time you wish for an upgrade.

In conclusion, the small size of a HTPC makes it an ideal appliance for any living room. It adds PC multimedia entertainment to televisions, allowing you to chat, surf the net, watch movies or even play games on the big screen. The possibilities are endless.

Article table of contents

DIY your own home theater personal computer – Installing the CPU

0
Tutorial - Build your own DIY home theater personal computer

Installing the CPU, some interesting parts

A small confined case requires some careful space management for components, also considering that regular parts do not fit well in such a small case. One of the most interesting and unique outstanding features of the case is the integrated cooling technology which amazing cool, quiet and stable as claimed by Creative, though this case is still largely a branded OEM case.

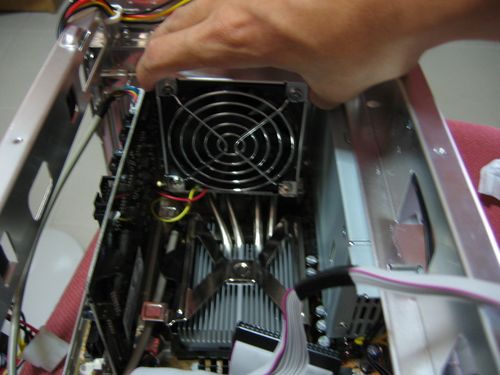
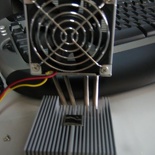
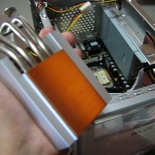
The unique heat sink works by transmitting heat emitted from the CPU through the heat pipes, which works as a heat transfer agent which then transfer the heat to from the CPU to the heat sink & single exhaust fan, located at the back of the casing. The fan also doubles as a case ventilation fan. so its very much dual purpose, a rather ingenious design.

The unique cpu heat sink & fan
Fig 5.0

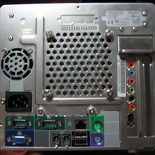
On the back of the casing (Fig 5.0) we have the mini PSU on the left the large fan exhaust vent at the center, add-on card slots to the right I/O ports are located at the bottom as the motherboard is placed in flat and secured on the bottom of the case.

Installing the processor

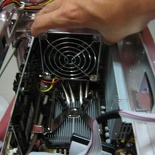
To being the installation of the CPU, the heat sink must first be removed, this is unlike normal fans & heat sinks & we must first remove the ventilation fan by unscrewing the locking screws found on the back of the case (Fig 5.0 & closeup at Fig 6.0). Then we will have only an L-shaped component with 2 heat sinks on either end still attached.

Fig 6.0
Fig 6.1

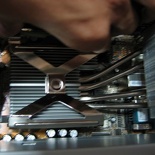
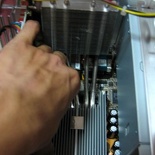
To remove the heat sink from the processor bed, start by holding onto the edge of the X like clamp securing the heat sink with 2 index fingers press downward gently to release the X clip & eventually lift the edges outwards to remove the clip completely from the edge lock (Fig 6.1).

The heatsink aside
Fig 7.0

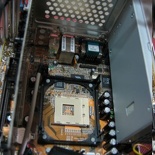
At this time the the processor heatsink can be taken out completely (Fig 7.0) from the case itself. The photo on the left shows the whole cooling assembly and the right the socket to insert your regular PC processor.

Fig 8.0
Slotting the cpu

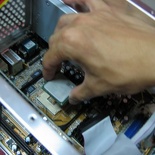
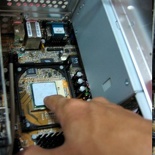
The base of the processor-side heat sink can be identified by the copper red heat absorbent surface (Fig 8.0). We begin first by placing in the processor on the processor bed after raising the locking lever. Do not use excessive force on when doing this. For Pentuim4 478-pin processors all you need to do is just to align the processor’s cut edge (top right) where its lacks one pin & see whether it teles on the processor bed side. Just gently drop the processor on the bed & secure it using the locking lever.

Applying thermal paste
Fig 9.0

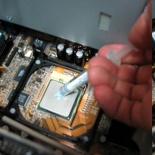
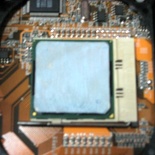
Thermal paste must be applied thereafter, you can use the included/supplied paste which in my case, Creative had supplied, in my case I am using Nanotherm Blue II in this tutorial. To effectively apply thermal paste for maximum heat dissipation, apply one blob of thermal past eon the processor. Next take the L-head sink & sandwich the copper side onto the processor, the result is having both thermal paste on both the heat sink & processor.

Fig 10.0
Fig 10.1

Using a clean finger of one wrapped in plastic, rub the smeared thermal paste on the copper surface, applying constant downward pressure & spreading it round where the processor would come in contact with the heatsink. after that, using a clean tissue or cloth, wipe the excessive paste of cleanly, the result is a more dull copper surface this is so as the paste now fills the inner micro crevices of the copper surface.

Fig 11.0
Fig 11.1

Now spread the thermal paste you’ve previously applied on the processor till you achieve a nice thin layer only on the processor surface (Fig 11.1). Use a razor or card to scrape away excess paste which overflow out of the processor edges. There you are done with the application part, now it’s time to assemble the heat sink back into the case.

Fig 12.0
Fig 12.1

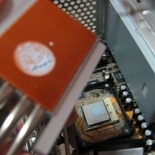
With that done, slowly lower the heat sink back onto the processor, secure the X locking clip. Thereafter return the cooling fan & secure it back using the 4 back screws. With the critical parts in place, now it’s time to install the add on cards and media drives, such as DVD or blu-ray drives.

Tutorial – Build your own DIY home theater personal computer

1
Tutorial - Build your own DIY home theater personal computer

A home theater PC is very much alike a regular home PC, only that it is used mainly more for media and visual needs. Also given the increasing adoption of alternative medias such as digital content sold over the internet, as well as soft-copy video, music files over conventional mediums such as DVDs or CDs.

A home theater PC feeds the growing trend of techies who wish to live the life with the media in their iPods through their Hi-Fis and not having to organise and go through the hassle of searching through CDs or individual play lists to get them.

Article table of contents

First Impressions- Creative SLiX MPC51C3

HTPC (Home theater PC) had evolved much over the years, but they still share one common trait- they are small and usually offered in a more sleek and stylish case allowing it to blend in with with your regular audio-visual equipment rack. Whether it’s sleek black, sliver or minimalistic white we are quite spoilt for choices now.

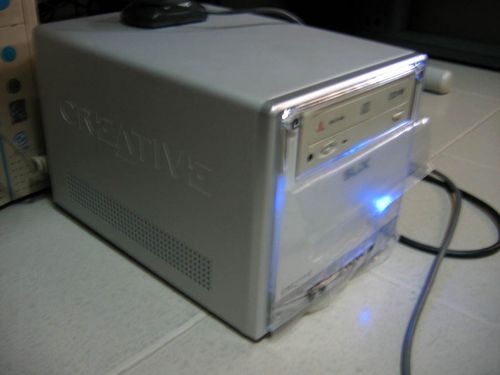
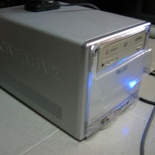
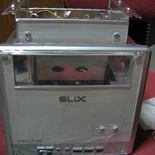
Building a HTPC (Home theater PC) is as relatively much more simpler than building a full or medium towered ATX PC, partly because of the pre-installed components mini PCs manufacturer usually offer in the barebone PC Flex ATX format. Taking the SLiX I have here as an example I will be using, it’s a shoe box PC case and has a sleek clean white front finish- which might go well and blend in quite nicely in any living room.

From what we’ve seen from other competitors in the market, for example Shuttle-X & MSI’s media PCs, Creative had too, came up with their own range of HTPCs with price & features being their selling feature. This Creative SLiX barebone retails at around $200SGD with the Audigy2 soundcard bundle option. What impresses me is not only the price considering what is bundled, but how smartly the way the unit is designed- making full use of the given space they have in the tiny unit by thoroughly integrating the motherboard & soundcard features with the included impressive front panel (spotting digital in & out, line in & out audio ports, followed by 2x USB 2.0 ports & 1x firewire port) for accessibly & convenience.

The package
Fig 1.0

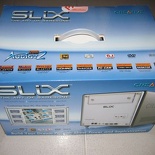
You can’t judge a box by it’s cover!

As the saying goes don’t judge a book by its cover, but Creative had surely did an impressive job for the box, printing everything out in full colour with their rather over emphasized signature: “SLiX- The Art of Barebone” logo & emblem reflected almost on all sides of the box (minus the bottom that is). However, what i find quite misleading is the printing of several excessive logos such as the modem, storage blaster, nomad, inspire, pc-cam, combo drive & 3d blaster logos on the top of box. Any layman would misunderstand & think that the featured products are actually included in the package, though Creative’s intention was a maybe display creative products which can be used or complemented with the system.

What I could recommend is maybe at least put some text stating this or something. Other than that, you can get quite a deal of information from the box itself, sometimes I even have to refer to it as the included manual don’t spot so much info, sadly. With a relatively good first impression, now lets see what we have inside.

Some blabbering on the case

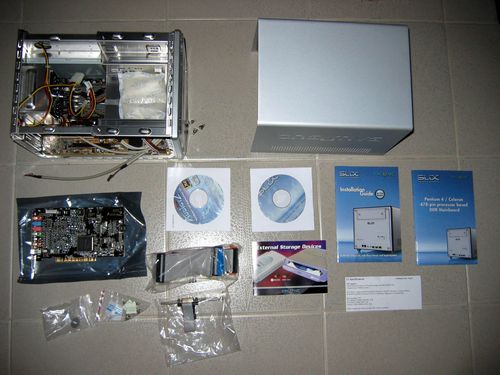
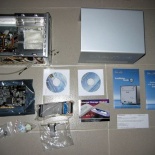
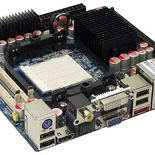
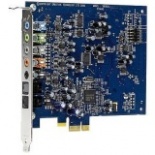
In the box you will get the SiS FS51 Flex-ATX mainboard already mounted in the casing (top left of Fig 1.0), spotting the SiS 651 Northbridge supporting Intel northwood 478-pin processors with Hyper Threading support & SiS 962 Southbridge. To its right is the casing’s outer housing followed by the bundled Audigy 2 soundcard on the middle left, application & driver cds, motherboard & installation manuals. From the bottom left we have case screws, followed by 2xIDE cabled & 1x floppy cable, a Creative product catalog & warranty card.

Here we have the case, as it is:

The Creative SLiX mini case
Fig 2.0

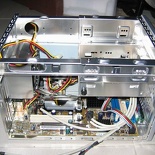
The whole case is constructed in aluminum with some steel ascents and the corners for strength, noticeably is the lightness of the exterior case cover which lifts off effortlessly after removing 3 securing screws at the back of the casing, the process is tool-less: a luxury norm to many who dislike the hassle of toying with screwdrivers. The design of the casing brings about a few limitations, due to its small size. For instance in order to access major components such as the CPU, RAM, AGP/PCI-E & PCI slots, you have to remove the upper driver cage/housing. This is done easily by removing two locking screws on the top of the case & sliding it out from the top of the case (Fig 2.0).

Installing add on cards

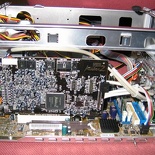
With the drive cage out of the way (Fig 3.0), then you can go about installing the soundcard, graphics card (if any, shown in Fig 3.1). Difference manufacturers usually have their own layout for the internals of the case, let be the way they are designed to be mounted, so it pays to give the instruction manual a read or two if you are stuck.

Due to its confined space, slotting in cards may resulting in sticky situations or entanglement with wires around the case, with the exception of messing up system air flow, wires are recommended to be tucked & kept nicely around the edge of the system frame so as not to cause obstruction, I will touch more on this in a later part of the tutorial.

Fig 3.0
Fig 3.1

This system have onboard SiS integrated video, spotting a 32MB shared integrated graphics controller, taxing video memory from the system memory. It performs expected well on normal games at medium settings or for just the casual net surfer or word-processing job, however don’t expect it to even run to the latest high requirement games at all.

The key features of a HTPC is not much of processing power, but the ability to integrate well with your current Hi-fi home theater setup, which means able to output video to your TV and speakers.

There is no TV out on this on board video, so it’s quite a bummer if you wish to hook up your PC to your TV via S-video, let be basic composite. You should always install an additional graphic card for better performance. The video card slot is usually a shorter slot located at the ends of the motherboard or on the slot nearer to the CPU, it may or may not come with a securing lever.

Despite the size of the case, it has enough space to accommodate relatively large single slot video cards (up to 22cm in length) with enough space up to the internal length of the case with the front panel wires out of the way (yes they are removable) as well as a large cooler for the graphics card as well, though a HTPC is not necessarily suited for gaming, unless you intend to do so on the big screen.

Video out

It’s pleasing to know that with most modern HTPC-dedicated boards out for sometime now, these days, HDMI, DVI-out and standard VGA out for on board motherboards are fast becoming a norm unlike this unit which I have here.

Furthermore with many LCD TVs these days accepting VGA/DVI inputs you do not need any fancy converters or messy S-video cables to deal with now, and both the TV and your graphic card will sync the maximum allowable resolution an refresh rate automatically. It’s simply just as easy as plug and play now.

Audio out

This motherboard, on the other hand, do not have onboard sound, but that differs from board to board. In this case the PCI slot is very much reserved for the bundled soundcard. Otherwise you may consider going for an external soundcard like the USB Extigy series. Otherwise the expansion options of this system is quite limited due to the system’s small size thus the lesser number of PCI card slots.

From my own experience, though these days on-board sound so offer high rated sampling sound and 6.1/7.1 surround, I will still highly recommend a dedicated soundcard for the best audio experience, even an external budget card will beat the quality of that offered by onboard sound and with 6.1 and 7.1 surround offered as standard these days in add-on sound cards (e.g from ASUS or Creative) hooking it up to your Hi-fi or amplifier with the appropriate 3.5mm to RCA stereo cables is as easy as pie.

Fig 4.0
Fig 4.1

Installing RAM

Now back to the hardware part, RAM slots are located perpendicular to the front orientation of the case. After checking for slot alignment, installation is simple by just opening up the ram securing clips & slotting the ram stick in, applying low constant downward pressure (Fig 4.0). RAM modules are usually designed to be idiot-proof and can go in only one way. Once inserted the clips will automatically lock the module in, do ensure that both clips are clicked in place otherwise your module may not be seated or inserted properly and could not be detected by the system when you turn it on later.

Article table of contents

2nd doctor visit

2

Followed up friday’s visit to the doctor’s… well this time to satisfy my mum’s worries (aka curiosity) about my fluctuating fever. Personally I saw no need for it- I am feeling better than I was the last few days. Then she painted a picture, together with my dad about viral infections, dengue & more. So what can I do? Anyway, my dad volunteered fetched me back to Alexandra hospital for the follow up. & heh… I can say, this is one of the few visits to the doctor where I really can’t think of ANYTHING to say… well at least there is nothing wrong with me! my temperature is around 37.0.

All I can say is, leave it to my dad who did most of the talking… & settled for a blood test to confirm that theres nothing is wrong with me. & true enough everything’s ok, white blood cell, palette count all normal the only reason ruled out is a flu viral infection which caused the fever in the first place. Anyway like all professionals, the doctor was understanding of my parents intentions & concerns. Considering I just recovered from a relatively long fever since wed in their records, got 3 days light duties to go with my new set of medicine, including a scary bottle of antibiotics.. now my medication spans over 6 different kinds of tablets & syrup… man do I feel sick by looking at it…
Back to camp tonight. & damn didn’t get to drive this week, well maybe next week then when I am fully recovered.

Beautiful sunday

0

Didn’t go out today, as I wanted more rest at home.

😉 Since I’ve passed my driving test, I think hey why not compile a small set of tips & hints for anyone out there taking the traffic police driving test. Hope that may prove useful.
Reality check:
Payday is on & pay is in, but my marksman bonus is not in yet.. grrr
Temperature check highest 37.1C, lowest 36.6C last taken around 3pm today. Seems normal & doing good!

Items left on wishlist:

Clean new system

0

& there I am back typing my blog from my own computer again.

Formatted, installed win XP on my system. Now everything’s so fresh clean & fast, just finished installing all the needed drivers & applications. Now whats left are GAMES GAMES & GAMES, would be running 3D mark to benchmark my new hardware, would be posting updates maybe tomorrow or so. With all these at hand, the only danged thing is stupid software not allowing me to activate windows through the internet, said I used up all my “activation tries” would this be always an upgrader’s nightmare? Though there are many other “down & dirty methods” to get XP activated with just a simple clicks, hacks & apps you can find on the net. I guess, well I just don’t wanna “pollute” my computer with all this shitware, furthermore considering that I am also using an original winXP OEM on one computer, the best way to get it donw & over with is to call MS to activate my copy of win xp by phone tomorrow then.
My next upgrade would be a nvidia Geforce 6 FX6800 to replace my current Geforce 4 Ti4600, just waiting for the price to drop.