BMWs are great cars to drive, however, just like any automobile, wear and tear plagues most actuation parts in vehicles. One of the few annoying things about BMWs are interior button wear. The good news is that most of these fixes can be easily be done yourself. It spares you to send you car in for an expensive repair. I shall illustrate replacing worn BMW engine start button on the 3-series F30 model.
Your engine start-stop button is probably ones of your most-used buttons in your car, with the other being your AC button. However, a replacement start-stop button will cost you at least about a hundred dollars including labour. This is because an official repair with BMW will involve you having to replace the entire start-stop button unit and circuit board.
Purchasing a new engine start-stop button on the cheap
However, the only part you really need to replace is the worn out button itself and not the entire start-stop unit. Also, doing this yourself costs you only about $8 SGD (about $5 USD) including shipping. Some retailers can even go as low at $3.60 USD including shipping. There are a couple of other variants too, such as blue coloured buttons or a sportier red button to go with your interior sport line stitching.
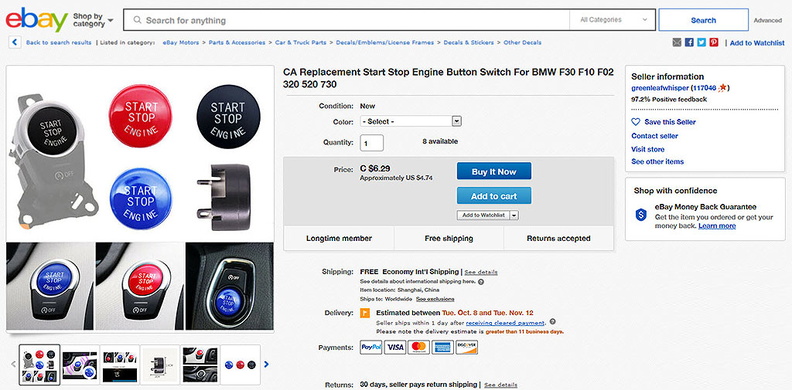
Do note that this article on focuses on changing the worn physical plastic button itself. If there are other electrical faults such as your button not lit or a malfunction sensor, you will have to end up changing your whole button assembly.
Removing the start button unit
You start off by removing the start button unit by hand using a soft plastic pry tool. You need a soft plastic pry too or you may risk scratching or denting your soft-touch console. It is not advisable to use hard objects like a screwdriver.
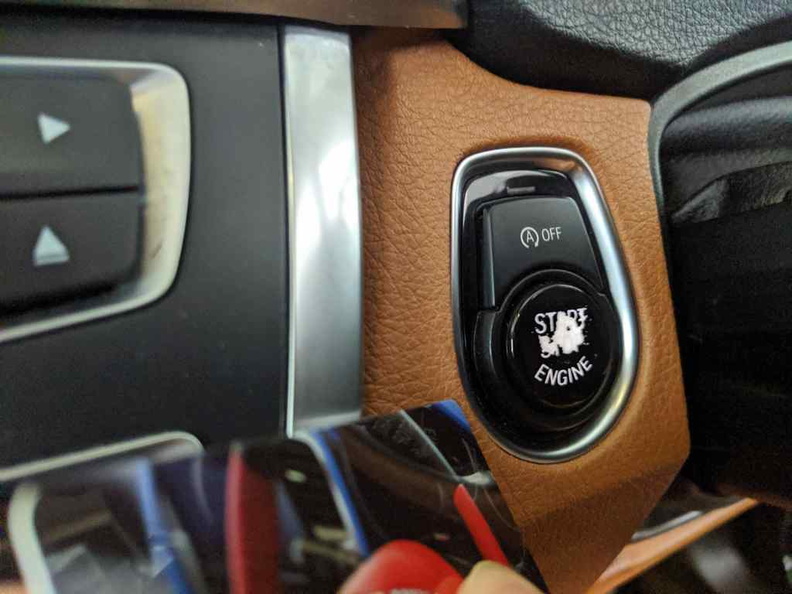
You can start by inserting a plastic card or a plastic the pry tool (those to open electronics) at the bottom rim of the start button unit. Slowly move around the edges and lifting the unit but unhinging it out of the dash recess.
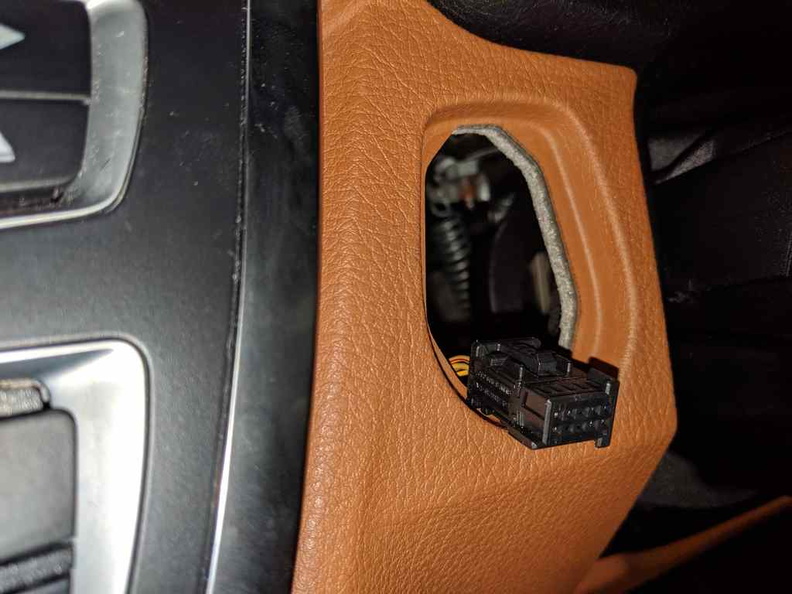
The unit itself is held in by soft metal retaining clips securing it in place. It pops out easily when you get it half-out. Disconnect the internal wire and leave it out of your console.
Opening up the assembly
The tough part is having to unclip the removed button assembly unit by hand. The good news is that the entire assembly is tool less and held together with simple plastic retaining pins. There are 6 clips in total, two on both top and bottom ends and one in the middle. Start by unlocking the clips on one side and working around in a circle. Also, take caution into avoid raising the plastic clips too high or you could risk breaking the thin plastic.
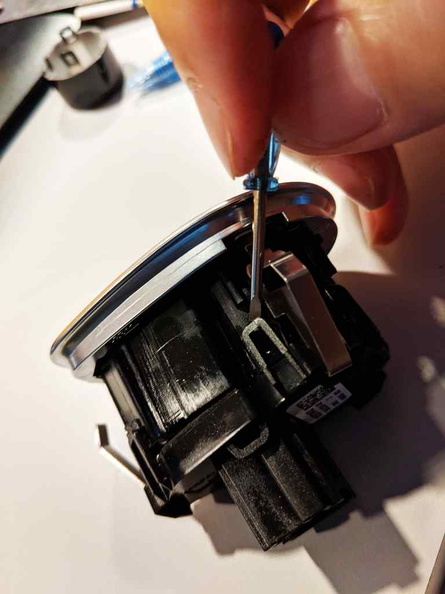
You will need a few specialised removal tools and micro screwdrivers, preferably those micro ones used for spectacles to get the assembly open. Also, you will need a couple of small flat plastic inserts to hold these retaining clips open or they will snap back right in.
With the rear black plastic encasement removed, your button assembly is now open into two encasing parts. On the side with the button, you can see two retaining clips at the button back clasping them in place.
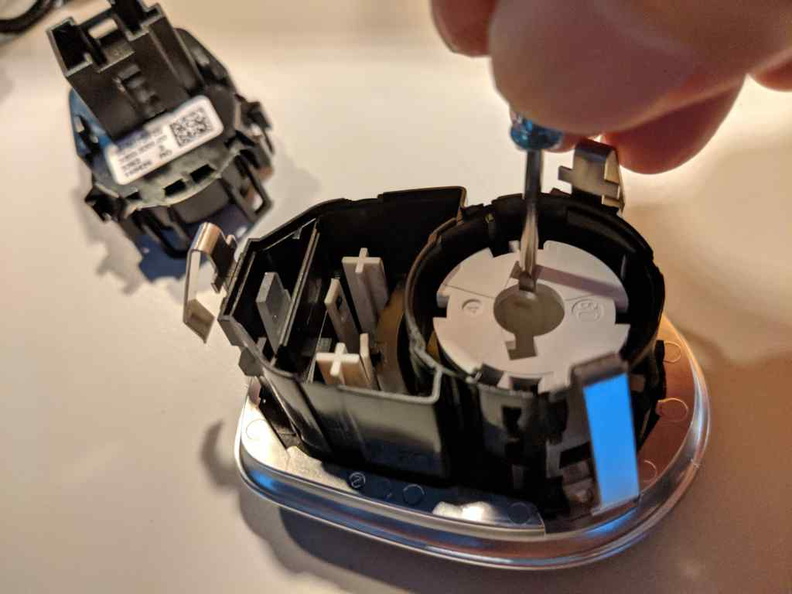
Similarly, with the micro screwdriver, simply just slowly hinge these two and your old starter button will simply pop right out. That is all for disassembly process. Do note in this entire process, you never need to use any force to remove the parts. If you need to, you are doing it wrong and risk breaking something.
Popping in the new button
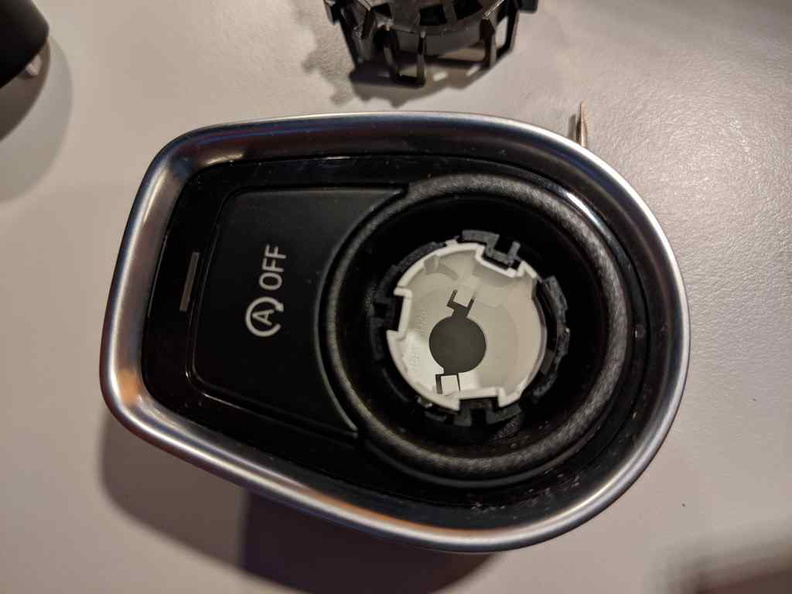
Inspecting the button unit the old button out, here, you can tell that BMW starter buttons are simply just black painted onto translucent white plastic underneath. This allows the red backlight to shine though for the button engine start text to be lit and visible at night. There is also a soft rubber piece as well as your button PCB board. Be careful to handle this board with care. This board interfaces with your car and provides the rear illumination.
Putting it all together
Assembling your engine starter button assembly involving doing everything you had done to this point of time in reverse. Simply insert your new button into the starter assembly, ensuring the rear two locking clips hold it in place. When secured, your starter button should stay locked in and not fall out if you shake it face down. Simply insert your new button into the white holder recess, ensuring that the bottom two clips are locked and holding the button in place.

Ensure that your rubber button strip and PCB are inside the assembly, as they can easily fall out. The rubber piece should sit in between your starter button and the PCB on the rear end. It all goes into one direction, with the PCB rear connector poking out in the rear casing wire hold.
Closing up with functional checks
Finally, simply snap on the rear black outer casing, ensuring that all six securing pins are locked in and the unit is assembled without any rattling inside. Here, you can do a functional check by pressing the starter button, it should feel tactile and spring the button out after you press it.
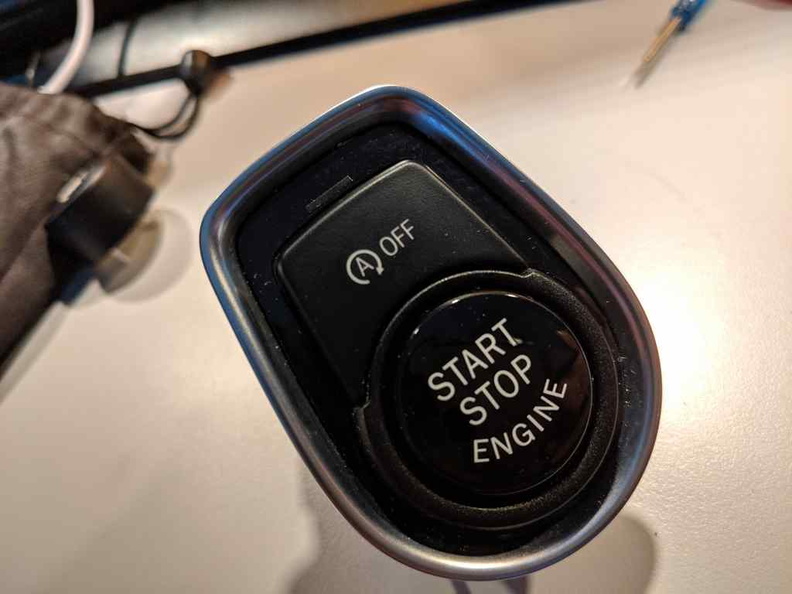
Thereafter, just simply connect the dashboard wire into the button unit and slot it into the center console hole. You “start-stop” engine button will now light up, showing your PCB is placed correctly.
The last functional check now is to actually start and stop your car with the new button, as well check that your start/stop override button is working. Do note that as the procedure is pretty minor, you need not have to disconnect your car battery for the entire replacement process.

That’s all folks! I hope you find this tutorial useful. Do note that this method also works for other series of BMW models. As far as I know, this includes the other series models (e.g. 1, 5 series…) as well as X-series, as they use similar assemblies. Just ensure that you buy the right model part for your car on from the online merchant. Hopefully this tutorial helps you save a few bucks into doing up the fixed by yourself. Cheers!