Getting on fine details
Usually my favorite part of the whole process. It involves drawing, painting or spraying in the details which gives your model the extra personal touch & uniqueness. It is this cross-road step where the true skills of a modeler shines, tool handling & attention to details which sets the professional & beginner modelers alike. The detailing procedure follows nicely after the inital planning phase. Are you going to do a standard pose model? A fight scene? Or a weathered realistic look?
Of course you should ask yourself these questions even before you open the kit. Have in mind that what your have in your kit-box is not what you only have. Manufacturers only provide what is barely needed for a standard pose-able model. You can always add additional components/accessories/armament to your model, for example as your modeled mecha is seen featured in a TV series, or an attack helicopter with additional missile pods, but with parts not included in the kit.
Flexibility is the key. Think out of the box!
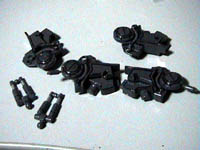
In other words, build your own parts! Let be creating realistic textures. For example, damage modelling in a mecha fight scene involves deliberately tearing/breaking open parts of one of your models, revealing inner components, you have to recreate these parts as realistic and accurate as possible. Besides craving or shaping these parts from expensive foam or putty, here are other parts you can make from household items.
Small plastic pipes/straws for additional detail to joints/articulated parts
Rust patches
Mildly brushed coloured saw-dust patched with glue
Thin antennas
Nylon/fishing line strands
Venting covers
Fine wire mesh/gauze
And the list goes on, you can be amazed how normal household components can be used and incorporated into your model.
- Compressor driven airbrush
- Medium-Fine tip paint brushes
- Assorted acrylic paint colours
Fine detailing
- 1-2/32″ Fine Tip Brushes
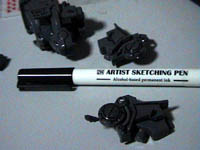
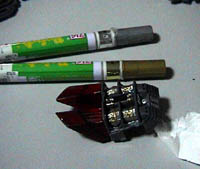
- Gundam Markers or Fine Paint Markers
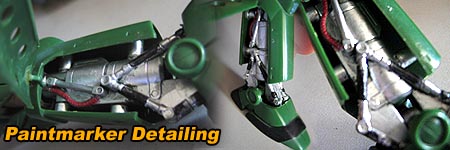
Working with paint markers
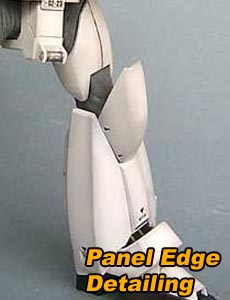
Paint markers are a grate beginner’s tool to quickly and effectively apply permanent all-surface paint on your models. It is useful for where you require a quick dash of colour without much hassle or anywhere where small thick coats of paint are required. You can see some examples of paint marker detailing on the leg of a Patabor hell diver Mech I have here, these are the details in the leg itself which can be seen externally.
If you need to apply paint over large flat areas or require a more even finish, you are better off buying bottles of acrylic paint or an airbrush. Paintmarkers are not exactly cheap at about $4-5 per piece. My next part will talk about the paint details application processes, which of course comes after priming and your base coat.
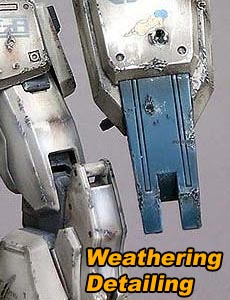
Weathering
Is the process of giving your model the rather seasoned dirty look. It generally involves applying a very dark but otherwise thin layer of colour on the edge panels- this is where dirt and rust will usually build up over time in the air. A good way to notice or find out more about this yourself is to do some research or find some photos on old mechanical parts of visit an abandoned or defunct industrial facility for reference. thus “weathering” and achieving a dirty but impressive look. It is done in 2 styles – preshading or postshading, each with it’s own 2 stages of paint application.
Preshading process
You coat a colour comparatively darker to that of the existing base. Then upon drying of the first coat, apply a lighter shade in the middle of a panel, so that the edges appear darkened.
Postshading process
Is the direct opposite of pre-shading, (whichever of personal preference). As straight forward as it is, it involves the painting of a lighter base shade over the whole panel, then followed by the darkening the panel edges with a heavier, darker tone.
Application
This can be done by manually brush painting varying shades set on pallete. However, the procedure is still best done easiest & fastest with an airbrush.
Moreover, the airbrush gives the model a more comparatively blended & uniformly paint application, contrary to brush application where colour banding might be evident, unless you paint very good intermediate bands on the surfaces without smudging, but it still can’t beat a good ol’ airbrush!

Therefore, if you see yourself coming to with quite alot of models to do down the line, it will be relatively more economical, but expensive at the start to purchase & maintain, a compressor powered airbrush is a good investment for the budding modeler to be, let be the amazing details one can pull with it for projects to come! Do note that airbrushes can be used for base coats as well (applicable to the painting page 2 as previously mentioned in this tutorial).
Panel Lining
In most models, let be tank armor or mecha bodies. Panels are evident. Detailing by outlining these panels or making them profound can greatly improve the outlook & detail of your model. It is usually done using fine tip brushes or fine paint markers. This is particularly applied for clean posing models without much weathering. Below are example results of discreet panel lining and weathering.
Laquer finishing
Otherwise known as the sealant step.You may think that it might be too early for this step, yes currently this step is only for small internal parts which cannot be reached on the final external surface paint finish (like internal engine components, pilot cockpit, etc).
Though seemingly not as important as it as the outer clear lacquer application, (mainly as these parts won’t be directly be exposed to the external elements), But this step is essential to preserve, prevent possible paint fading/discoloration given high humidity/aging etc, & protecting your detailed work, especially if you are a person of detail.
Take note & plan carefully which internal parts & to finish before embarking on the assembly phase which on the next section.