Article table of contents
- Introductory components
- Installing the CPU & memory
- Casing & installing the motherboard (aka mobo)
- Graphics, soundcard & add-on cards
- Internal & external media drives installation
- Cabling, PSU, case LED lights & power button
- Additional cabling for output ports
- Finishing touches, power on self test (POST) & BIOS
- Operating system installation (Win XP)
Operating system installation
An operating system is essentially a disk operating system which boots up when your system starts, it’s essentially a shell allowing you to use the PC in a environment, let be in shell of graphic interface mode. Without an operating system, your PC will only be an shell or expensive paperweight- all mainstream computers out there require an operating system (OS) to perform productive tasks, let be the platform to run compatible software like office word-processing, gaming, etc. This section will go in detail how to install your preferred OS.
Operating system installation (general)
These days consumers are spoilt for choice on the variety of OS offered. But they mostly fall into 2 categories, open source and proprietary.
Open source operating systems will include those offered by Linux (and their variants like Redhat, CentOS, ubuntu, etc), and Unix, including and their sub variants such as FreeBSD. These software are generally offered free and developed by contributors who improve the code with every release, given that, the source code is generally made open for all.
Proprietary operating systems include the windows operating system as well as apple’s Macintosh OS, such as OS X. The source code of these operating system are all kept in secrecy and only the named releases made available to the public.
For beginners and students, I will usually recommend proprietary software as they are not only more user friendly, but more widely adopted for use by people generally, such as in work or at school, to the mention the variety of software written specifically for that operating system. The large proportion of users using them ensure begineers do not feel alienated to the environment as well. But they do come at a price- literally and you have to buy proprietary operating systems, which can set you back a couple hundred dollars for a descent feature packed one.
Windows XP
In the following section, I will first describe on installing windows XP (aka experience) onto this newly setup system. The version of Windows XP illustrated here is the Windows Xp Home OEM version. Then later, I will go onto installation for other operating systems.
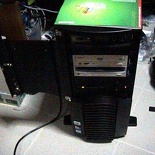
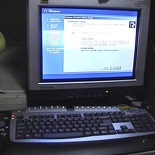
Just like Vista and Windows 7, Windows XP may be seen to be a savior and an answer in idiot-proof operating system installation. There is nothing much I can tell you what to do in installing Windows xp, as everything is all straightforward and automated- After POST, insert the operating system install CD-ROM (make sure you’ve set the primary boot device to CD-ROM in the BIOS) restart your computer. Sometimes, the system might require you to key “any key” on the keyboard to start the boot from CD, you may have to be alert for that message or the POST will by pass the CD-ROM boot and give you an “Operating system not found message”, requiring you to reboot to try again. One OK, thereafter, your system will detect and read the CD and will prompt you further on the installation.
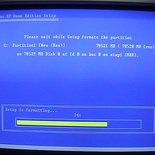
Follow on screen instructions to first format your hard drive (bottom left picture), which may take quite sometime, depending on your hard disk capacity. Then later setup will go on to install the necessary Windows xp system files (bottom right picture).
After the setup is complete, your computer will do a final restart (out of the many restarts) and will boot up into the newly installed operation system, do give your computer sometime to configure settings before starting.
Thereafter, you will be rest assured that everything went well when the trademark “rolling hill” background greets you at the end. Then you will have to activate the software by following the help hints on the interface, you can’t really miss it.
Installing other operating systems
Other OS such as Linux and FreeBSD are generally targeted at more advanced users, though installation for these OS now are more slip streamed and easy to install as their proprietary counterparts there is still a degree of technical know how of how the boot and installation process generally goes. This is in particular if you intend to dual boot 2 operating systems on one PC as well, you can either do so with 2 separate hard disks (as each may require a different file format) or create 2 or more partitions on a single harddrive for that.
Older OS requiring floppy disk boot
Certain older operating systems may require you to create a boot disk to run certain command prompt commands an fdisk and an eventual operating system install from a separate CD or floppies like those window 3.11 days. Which is of course, very slow, tedious & cumbersome. The chances of an unsuccessful install is also comparatively very high compared to that of installing XP or it’s successors as stated earlier.
Creating the boot disk
If you wish to install Win95, Win98, Win2000 or so but choose (or unable) not to boot from CD, start by creating a bootable floppy disk. This is to load the CD-drivers which are not included in the CD during install so your system can read the CD drive and extract the installation files from there. To create one, simply use another computer, using Win95 OSR2.(B or C) or Win98, select create boot disk on floppy at the ‘My Computer’ section, then the computer will copy the required system files to boot. Alternatively, you can search the net for system boot files to be copied on a floppy, though this is not recommended unless you trust the website providing the boot source.
The following files should be copied onto the floppy itself, with an explanation of each:
FORMAT.COM – Used to format harddrives
FDISK.EXE – Used to create drive partitions
SYS.COM – Used to transfer the System Files to the hard drive and make it bootable.
FORMAT.COM can also be found on the Windows 98 CD in the \WIN98 directory.
CONFIG.SYS – Contains system config commands.
AUTOEXEC.BAT – Contains DOS boot batch programs.
Edit edit CONFIG.SYS and AUTOEXEC.BAT to load the CD-ROM support. More on editing the files can be found here.
Insert the boot floppy & Windows setup CD-ROM into the PC. upon starting up. Ensure that the first boot device is set to “floppy” change the config & reboot if necessary. Upon booting from the floppy, you will see a message stating that a RAM drive was created. If you are installing to a new hard drive, the RAM drive will be none then otherwise, drive C: & you will see a message: ‘Windows has detected that drive C: does not contain a valid FAT or FAT32 partition…blah blah blah’
From here, I will use the following drive letters to represent the following drives
C: Local Harddrive
D: CD-ROM DrivePartition the Harddrive with FDISK:A:\ FDISK
Press ‘Y’ for large disk support (telling FDISK to create FAT32 partitions).
Choose 1: ‘Create DOS partition or logical DOS drive
Choose 1: ‘Create Primary DOS partition’
Once done, press ESC to exit FDISK, re-boot the PC again with CD-ROM support
Formatting the Hard drive
This time you boot, the RAM drive should move to the next available drive letter (D: if you created one partition). If you are not sure if FDISK was able to partition the whole hard drive, run FDISK again and use option 4 to view partition information. At the command prompt, type:
A:\>D:\FORMAT C: /S
A:\>A:\FORMAT C: /S
The ‘/S’ option will make the hard drive bootable. Next, assign a Volume Label when prompted. However, on some systems with more than 256MB of memory, the /S option of FORMAT.COM may not work. If this is the case, run FORMAT without the /S option.
Alternatively, with CD-ROM support already on, you can key this into the prompt instead:
(using FORMAT.COM from the CD in drive D:)
Note: However, if you receive a “Bad command or file name” message, you may need to extract the Format.com utility to your startup disk. To do this, type the following command at a command prompt, and then press ENTER:
Later, FORMAT.COM will show the size of the formatted drive, which will always be smaller than the size FDISK reported.
Transfering System Files to the hard drive:
There are two ways you can get about installing the OS. The first by starting the setup straight from the CD itself. The other goes about by copying a copy of the installation cabinet (CABS) files to the hard drive. Though it may take up a considerable amount of hard disk space, you can conveniently access them without the need of a setup disk if you choose to reinstalled the OS again. To do so use the SYS.COM command to transfer the System Files to the hard drive and make it bootable:
OPTION 1: Starting the installation from the CD itself, at the command prompt, type:
A:\CD D:
D:\SETUP
Windows setup will start thereafter.
OPTION 2: Installation from CABS, at the command prompt, type:
A:\>SYS C:
Followed by creating the drive C: CABS directories:
C:\>MD WINDOWS
C:\>MD WINDOWS\OPTIONS
C:\>MD WINDOWS\OPTIONS\CABS
Changing Directory to the Cabinet directory and copy the contents of the Windows 9x or Win2000 CD, to the windows directory on the hard drive:
C:\>CD WINDOWS\OPTIONS\CABS Copying the Install Files to the Hard Drive C:\WINDOWS\OPTIONS\CABS>COPY D:\WIN98
Finally, start the Setup Program
C:\WINDOWS\OPTIONS\CABS>SETUP
The DOS version of SCANDISK will and check drive C:. When it is done, select ‘Exit’ and the windows setup program will load, follow onscreen instructions, reboot & wollia! a working OS.
Installing an alternative or secondary OS
Having previously briefly touching on booting with multiple OS, doing so now is very much a piece of cake as the manual work required of the yesterday. Generally for reach first operating system you install, it will write a master boot record (MBR) on the boot sector of the hard disk, this will contain the required information to tell your system on POST that there is an active operating system active on that drive will will call the required files to start the boot process.
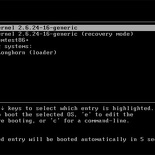
An OS will require it’s own partition, the partition can reside on separate hard disks or one made by a partitioning software such as gparted. If you already have a running PC, you can use hard drive partitioning software such as Partition Magic. This is so as each OS may require their own type of file format to run on- Windows prior from Windows ME will require the NTFS format where Linux and Unix variants such as Ubuntu and FreeBSD systems will require the ext2 or ext3 format, their equivalent of the boot loader for Linux will be GRUB.
Running Apple’s Macintosh operating system is very much possible on a PC now, given Apple’s switch to the x86 processor architecture allowing the OS to be booted from a PC-based environment, prior to that, you will need to purchase a pure Mac system due to it proprietary hardware setup. Mac OS X comes standard with a multi-boot features out of the box, with older versions before OS X requiring Apple’s multi-boot utility also known as Boot Camp.
Each OS installs very much like Windows XP which I used as an example earlier, simply just insert the install CD and boot from it at POST, then when choosing a drive to install, chose an empty pre-created partition on your harddisk (or attach an additional hard disk) to format and install all the required files inside. The current residing OS will then add a boot record in the master boot record and will prompt you a time-out selection menu of which OS you wish to boot from each time you power on your PC, it is that simple.
Well, that, that is very much encompass what I have on this tutorial on building and setting up your new PC, let it be a Linux system or a Mac as well. Thanks your for your time in reading this article and I’d be glad if this guide proved useful to you.
Article table of contents
- Introductory components
- Installing the CPU & memory
- Casing & installing the motherboard (aka mobo)
- Graphics, soundcard & add-on cards
- Internal & external media drives installation
- Cabling, PSU, case LED lights & power button
- Additional cabling for output ports
- Finishing touches, power on self test (POST) & BIOS
- Operating system installation (Win XP)


thanks, i have really been helped by you tutorials.
thanks a lot.