I enjoy sketching and drawing as a form of expression, not to mention a way to relax as well. It’s a hobby I enjoy doing since I was a kid and never stopped since. This tutorial will cover some of the basic techniques I use in creating various hand-drawn artworks you see around the site.
Line art and planning your piece
Digital colouring with Photoshop
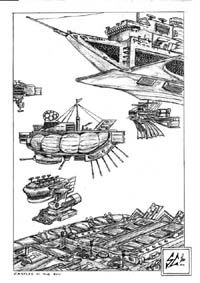
For this tutorial, I am using the art pieces “castles in the sky” a detailed black and white line art piece and “werewarrior”, a computer coloured piece as part of the illustration. in this tutorial.
Getting your arty inspiration
Generally, each artist has their own style & way of assembling a drawing. I usually draw from mind visualization, like using thoughts or snippets objects I’ve seen from a trip, pictures, etc.. & compiling them to form a picture. Such thoughts would usually “flash back” in my thoughts or sleep as drawing ideas. If its neat, I would draw it. Personally, I believe in retaining originality in my pieces & don’t like drawing with any help or from any immediate visual references.
Also I don’t recommend tracing over reference material since you will not learn anything by doing this. Though quick & effective, tracing is just a mechanical act of simply following lines. However on a lighter side, this is not applicable if you are drawing straight from an object (or scenery). Moreover using photographs as a visual guide will overtime, allow you to learn how figure, anatomy or mechanical art works, allowing you to get better with each practice piece.
Art for thought
What you draw usually comes from an inspirtation, having said that it will have a reason to exist and should not be forced or you will end up with something you will not appreciate. Don’t draw for the stake of drawing. Frankly speaking, such desires to draw with a meaning & objective comes naturally, so only pick up that pen if the feeling is there or your art will tend to suffer.
Tools of trade
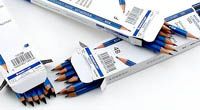
I usually use Staedtler mars lumograph type 100 art pencils mostly for large scale shading. Otherwise I would be always using mechanical pencils (0.5mm pilot leads) for drawing, shading and fine adjustments.
For longer lasting art pieces, the outlines & shadings are outlined with a fineliner black pen, this is done too if the art piece is to be painted in colour with paint or scanned as lineart into the computer to be photoshopped. Use soft plastic erasers, preferably those Pentel pracer stick erasers for fine erasing & reaching those “hard to erase corners”.
The art piece
Given the first line of supplies in starting pieces, next get started with the idea in mind, then choose a media, size of your choice, landscape/portrait to portray your thought. In this case, I chose a potrait scene with medieval floater ships in the air. Get that idea fixed in mind. Next, do a rough light skeletal sketch (like the one above), getting in place the location of your items or figures. From there, add the necessary objects (e.g ships, masts, guns, etc… for humanoid figures draw the head, torso & limbs as rough circles otherwise). Arrange the objects as you want them to be. For figure drawing, put arms, legs in a desired pose or action & make any changes lightly over the rough sketch if needed. From here, decide on the light and dark spots of the picture and shade using a pencil to achieve the desired shadows and erase white accordingly to create reflections spots or shine.
Lining
After achieving a desired sketch, its time to get the picture out of the bunch of liny mess you’ve made. Using more force on the pencil, do a darker outline of the rough work, highlighting the final positions of the piece. Detail the shading, reflections and shadows and erase away the lighter, obsolete construction lines thereafter.
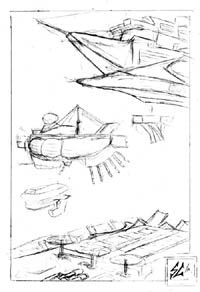
The basic draft lines

Darkening outlines

Adding more details
Detailing
Next comes my most favorite part- detailing. To your own perferences, add the desired details to go with your piece, like windows, battle marks, dents, nuts, bolts and weathering. Be sure to clean up the image by erasing any stray construction lines or pencil smudges in the background thereafter or they will turn up as “noise” upon scanning into the computer. When all done up, do a final dark outline, shading & touch ups before achieving the final outlook.
General inventory
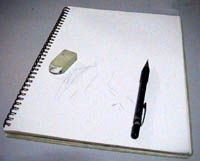
For a new hobby, it’s good to have the logistics to keep it going, other than struggling it always just because you do have have the proper material to draw on when the need arises. Thus it’s good to invest in some some simple art material, like a sketchbook for example.
Most of my drawings are first drawn into a sketchbook or otherwise lose pieces of attached A4 paper before sending it to be scanned on the computer. Black and white drawings are scanned at about 300 – 400 dpi, cropped to exact dimension and saved.
For planned colour pieces, black and white versions are first drawn, usually with more distinct outlines then scanned into the computer to be coloured on Photoshop. Having a sketchbook organizes your work, not to mention allowing you to draw almost anywhere, by just tagging the sketchbook and pen whenever you go.
Line art and planning your piece
Digital colouring with Photoshop